
Creature sound design tutorial
In this post, I want to show a little sound design demo I have done utilising material from the awesome new Boom Library release, Creatures. I was a beta tester for this library. As the name of the library suggests, it’s intended to create Creature vox with, and that’s exactly what I’ve done.
The purpose of this demo is to show how important it is to work with high resolution audio, and also to share a few tricks that I have learned with regards to vox processing. One of the great things of the Boom Library products is that they’re all recorded in pristine quality at high sample rate and bit depth (192kHz/24 bit), and made available at 96kHz/24 bit. This means that for a sound designer, there’s a lot of possibilities to tweak their material, as the high resolution audio means you can pitch and process until the extremes whilst still keeping good quality sound. Conversely, if the same source samples were provided at ‘standard’ or CD quality (44.1kHz/16 bit), you wouldn’t be able to do the amount of extreme pitch shifting shown in this demo without a significant quality loss.
So, basically this demo is going to explain how to get from this:
to this:
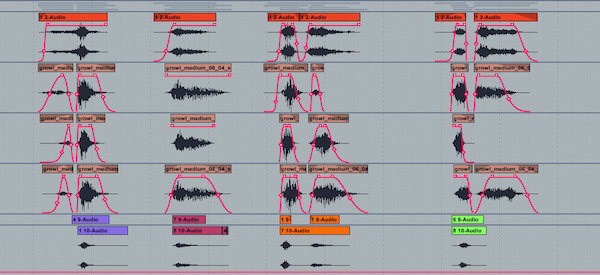
Have a listen to the sound files in the player below. They demo all the stages of processing and editing that I have taken the original source files through in order to get to the final result. Note that everything has been created using only the original 4 source files: no extra sounds have been added in the mix.
1 – Selecting the source files
I selected 4 sounds of a man growling from the Creatures library. Although the Creatures library comes with a lot of other sounds, plenty of them much more creature-like, I wanted to use dry and human-sounding source for the purpose of this demo.
2 – Pitch shifting -24 semitones
The first and important process… Pitch shifting the whole lot down to -24 semitones. One can immediately hear what we’re aiming for now… A big dirty monster! Here the beauty of high resolution audio can be clearly heard, as after the pitch shifting good quality sound file is retained, not a muddy file without any high frequency content.
I also applied some dynamics (limiting) and slight convolution reverb and flanging at this stage.
3 – Apply reverse reverb
An old but still nice trick… The idea is: reverse your sound, apply reverb, record the output, and reverse that recording once again. You end up with a sound that has a kind of ‘incoming’ or fade-in effect to it, and often works well for horror voices.
4 – EQ, edit and fade the reverse reverb files
Applied some simple EQ, editing and fading to make the sounds shorter and less bassy.
5 – Create growly layer
I now created a ‘growly layer’ to add low end and body by taking the originally pitched down version (the one from step 2) and applying some edits and FX (chorus, delay and modulation for widening the sound, mixed with a bit of upwards pitch shifting, and dynamics processing)
6 – Create raspy layer
My next decision was to add a raspy, aggressive sounding layer, to make it all sound more forward and in your face. I did this by again taking the original pitched down file, and applying various stages of fx and editing. First I used an EQ to take out the low end body of this layer so that it wouldn’t interfere with the growl layer. Then I added saturation/distortion to make this layer more aggressive sounding. The next stage was a similar approach to chorus/delay/pitch-shift to widen the sound, and another EQ to top off some of the high frequency content created by all these various stages of processing.
7 – Create whisper layer
To give the overall sound a bit more slimy and dirty character, I made another layer that I call the whisper layer as it’s more present in the upper-mid and higher part of the audio spectrum. The approach for this layer was to take a vocoder, and use its internal noise generator to mix noise with the original signal, creating an ‘airy’ sound.
8 – Create a short snappy layer
At this stage, I recorded all above 4 layers mixed together, and pitch shifted the resulting recording. My aim for this was to create a subtle amount of extra character to the overall sound, intending to make it a bit more ‘snappy’.
9 – The final stage: mixing and processing all 5 layers
For the final stage, I made a volume balance between the 5 layers that I had now created. Then I applied various stages of stereo width modulation, in order to make the creature sound big and vicious but not ‘unrealistic’ at the same time (yes, ironic…). I also applied more EQ and dynamics processing, plus an exciter to add more harmonics and make the overall sound richer.


Hey there,
Nice work. I did want to comment that to my ears, the second sample above has a ton of artifacting going on. Just my opinion of course, but I can hear that metallic over ring that’s a giveaway. Clearly starting with a lower register source and pitching less would alleviate this. I thought your processing chain was great. Cheers
Hi DP, interesting comment. Yes, I can hear what you mean – on headphones especially. There is definitely some artifacting which is mainly audible on the quiet parts. This has also been boosted and become more audible especially due to the first stages of limiting and flanging that I applied in that second sample. However, to my ears, in the final result the artifacting is pretty much masked and not audible any more.
Thanks for checking and lending your good set of ears, much appreciated!
big help. thanks. Just wondering what you mean by modulation as on my pro tools I have a section of modulation that has chorus and flanger within it, but you reference it as a separate thing. Also when you say about dynamics processing, what in particular do you change because I’m not as knowledgeable of what should and can be changed.
Hi Jake,
Yep, to clarify. What I mean by stereo modulation can be a plethora of approaches. But if you take Pro Tools for instance, it has an AIR Stereo Width plugin in the Soundfield section. This could be one element to use for stereo modulation, or in this case, to be more precise, stereo widening. As you point out correctly, chorus is very much a valid approach on its own for stereo modulation.
Another approach to stereo width modulation is ‘doubling’, plugins like Waves Doubler and Sound Toys Crystallizer do this out of the box. It’s basically a combination of detuning and short delays. By detuning and off-setting say 2 to 4 delay channels, and panning each delay accordingly, you can get a very wide and full sound.
As for dynamics processing, your approach will depend on what the end result is you’re after. In this case, as I was trying to make a big bad monster, I wanted it to sound loud and aggressive. The dynamics processing then typically involved using a limiter and turn the threshold down enough to heavily compress the signal. In Pro Tools, check out the ‘Brickwall’ preset of the Compressor/Limiter plugin. That is kind of the approach I’m talking about, although that preset is heavier and dirtier than what I did in particular for this tutorial.
Hope it clears things up a little.